How to Assemble your Flute
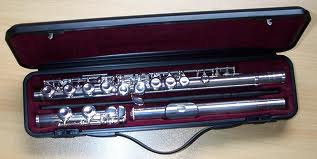
When you first open your flute case, you may be expecting your flute to already be together, and ready to go. However, while in the case, the flute comes in three seperate parts. These parts are known as the Head Joint, Middle Joint, and Foor Joint (as shown in picture above.) If you follow these 6 easy steps you are sure to safely and correctly assember your flute.
Step 1
Open your case, making sure it is right side up (tip: there is usually the label/brand of the case on the top, if not, pull the latches up)
Step 2
Put the head joint into the middle joint with a gentle twisting motion (the end of the head joint will only fit into one end of the middle joint, known as the barrel)
Step 3
Line up the embouchure hole (the hole in the head joint in which you place your mouth) with the center of the keys on the middle joint (if you look down your flute, the hole on the head joint and the keys on the middle joint should create a straight line. If they do, you know that you have properly assembled the first two pieces.)
Step 4
Hold the assembled head and middle joint with one hand, while you gently twist on the remaining piece (foot joint). Once again, only one end of the middle joint will fit into the foot joint.
Step 5
To get a comfortable playing position, make sure to line up the foot joint so that the rod running down it is centered with the very last key on the middle joint (the last key ressembles the shape of a tear drop)
Now your Flute is assembled, and ready for playing !
Step 6
Once you are done playing your instrument, carefully detatch all of the parts, and place them back in their proper places in the case.